This post is about getting set up with two incredibly useful tools; Google Calendar, Google Docs and gmail.
Google Calendar allows you to have a calendar that syncs with most mobile phones, can subscribe and share event information with other calendars, sends reminders and notices and is completely free.
Google Docs allows you to create and manage documents online, including spreadsheets and forms, you can share them with others and it keeps a complete revision history. Again all free.
GMail is old-hat these days, but when combined with these other two, it allows you to connect contacts to appointments, sync contacts to your android phone and desktop automagically, and Google has been adding new features.
The first step is to create a google account to use calendar, docs, etc…this also has the benefit of giving you access to google analytics (as discussed in our getting started with Google Analytics article).
Here’s what you can do with a Google Account:
- Access free Google products (i.e. iGoogle, Picasa Web Albums, Blogger, orkut, Google Groups, and so much more)
- Add a Gmail address to your Google Account (does not affect your existing account but adds features)
- Use Google AdWords and Google Checkout
This doesn’t have to be a gmail account, but those are free, easy to forward to another box, and make a few things easier, so the instructions on those are below as well. The link to create a new google account is:
https://www.google.com/accounts/NewAccount?continue=http://www.google.com/&hl=en
That form is pretty straight-forward. You do not need a gmail account to create a google account, you can use your current email. Fill in the form, you’ll get an activation email sent to the email address used.
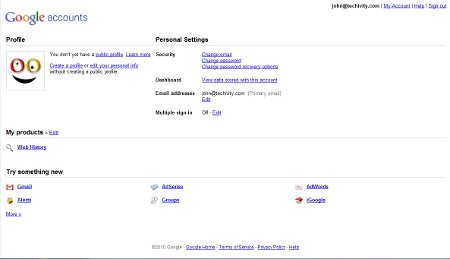
Once you get the activation email, and click the link in it, you’ll be able to add your mobile number if you like – that’s useful especially if you have a Droid phone! Either click “Manage my account settings.” on that validation page, or just go to https://www.google.com/accounts/Login to sign in to your account with your email address and password.
You will see the Google account services window:
We are going to set-up Google Calendar and GMail first – remember that although you already have an email account, having GMail will allow you to use GMail contacts, which will sync with your android phone automatically (as will calendar).
Google Calendar
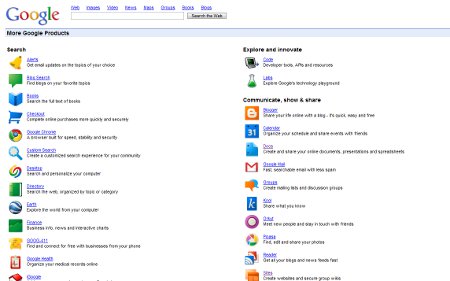
Click on the link on the bottom that says “More” – that will take you to the huge list of free Google Apps you just got for yourself. On the right-hand side there is an area entitled “Communicate, Show & Share”
We will talk more about all of these tools, because they are incredibly useful, but for now, on the right hand side, click “Calendar” which will lead you to the first of the Calendar set-up pages:
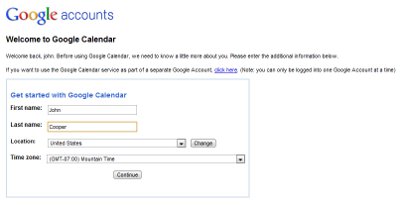 Fill in your name fields, location, and DO select the right time zone, that’s important for getting appointments right and sharing across calendars. The next screen you see will be your calendar. We will do a separate post on using Google Calendar to highlight some of the features and settings, for now, you are set-up. Try clicking on a date and time – that will let you create your first event.
Configuring GMail for Contact Use
Ok, now lets get GMail set up for contact use, so you can add contacts and link them to appointments. To keep this simple, click on the word “Mail” on the upper left:
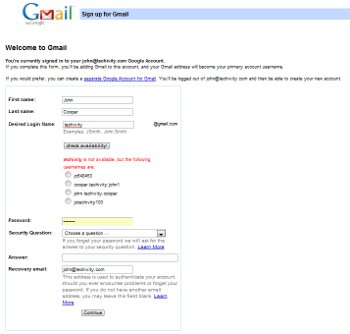
Which will take you to the GMail setup screen. Again, its a form, pretty straightforward – but here, I highly suggest you click the “Check Availability” button to save yourself some time. You’re going to have to pick something that is unique. For example, “techivity@gmail.com” is already taken.
The password field should be filled in with the Google Account password you just set-up. The next step is an account verification step where you can get a phone call or a text message to verify. Email allows too much fraud on free accounts, so tolerate this with some pride knowing Google’s at least trying to provide good anti-fraud practices.
Oh, and you will have to enter the verification code they give you, so if you pick phone call, grab a pad and pen.
Once you enter the verification code, you will see an entry-way page to your new GMail account. You can spend some time with those videos and instructions, or just click “Show me my account” and get going.
Now, as promised, here is a quick note on how to forward GMail to your original address, so you can just use contacts and don’t have to check GMail separately.
- On the upper right side, click on “Settings” to open the settings window
- Towards the center, in the first yellow/orange area, click on “Forwarding and POP/IMAP”
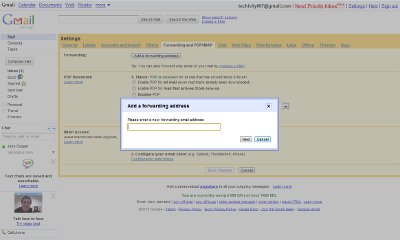
- Click the button that says “Add a forwarding address”
- Enter your original address into the pop-up field and click “Next”
- You will get a confirmation email, go click on that link
- Go back to the settings page and reload it
- Now you will see your forwarding email
- Check the box that says “Forward a copy of incoming mail to” and tell gmail whether you want it to keep a copy or not
- Click “Save Changes” down at the bottom
Ok, now anything that goes to your new GMail account will forward to the original email, you don’t have to check both accounts. To be sure you got it right, send the GMail box an email from your other account and see if it comes back to you, if it does, you got it, if it doesn’t, go back in and try again, or give us a call and we’ll help.
We will get more into using and configuring Google Apps in future posts, because its a lot of great and free functionality for small businesses and non-profits!

Recent Comments